Introduction


My name is Phoebe Hung and my candidate number is 8017. I completed brief 1: music industry. I worked with Georgina Harper-Dennett (8720) and Gabriel Meytanis (8560). To see my work, please click on the 3 labels on the right named A2 Research and Planning, A2 Construction, and A2 Evaluation.

This is our music video

This is our music video. Please view it in 1080p for optimal experience.

My Music Video

Front digipak text

These are the front panels of our digipak album cover:

Digipak front cover image

Digipak front cover image

Inside digipak text

These are the inside panels of our album digipak:

Digipak inside cover image

Digipak inside cover image
Our website:

Please click on the image below to enter the site


Showing posts with label A2 Construction. Show all posts

Friday, 23 September 2016

Construction Post 6: Website post-production

We constructed our website using Wix.com, a leading cloud-based development platform with millions of users worldwide. It features the only drag and drop website building platform with HTML5 capabilities with no need to code, making it a very simple and user friendly software.


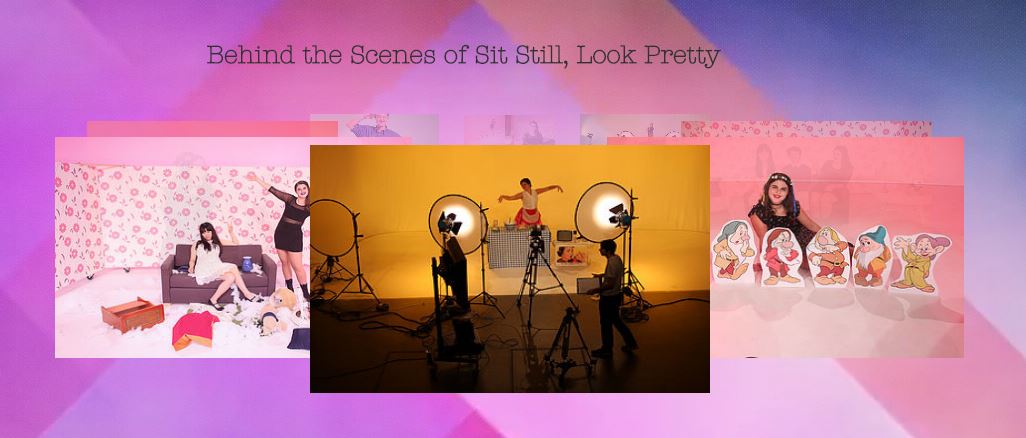
Below is a brief video in which I explain how we used some of the tools on Wix.


Editing the website

Working on the website with Gabriel

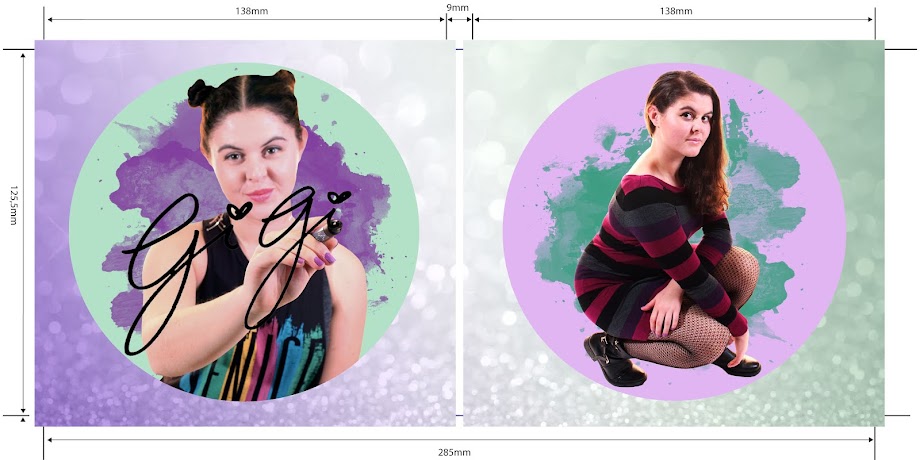
When working on the website, my group members focused on different sections and had to edit at different times. This was because, if two people were making changes at the same time, only one would save. Therefore, it was a better use of our time to delegate the roles amongst ourselves so that while one person edited on Wix, the others did alternative tasks. For example, I edited the background and slideshow images on Photoshop so that Gabriel could upload it onto the website.

Conventions and reference points

When I worked on the website, I focused on making sure that it was as conventional as possible. In order to ensure that we used the forms and conventions of a website, I used the research that I had done into websites and my collection of references to create a fully functioning website that would gratify audience's needs and expectations and be an interactive experience for the consumer.

I incorporated Henry Jenkins's ideas on participatory culture into the website by making sure that we had possibilities for the audience to become prosumers and interact with the website. For example, the quiz allows the audience to answer questions about GiGi. We also have purchasing opportunities for the audience to buy merchandise.

Henry Jenkins quote on participatory culture


The reference points have greatly influenced our decisions when we created our header, slideshow and footer:

Header and slideshow

We created the header using inspiration form Daya and Carly Rae Jepsen. Both of their websites were predominantly bright and full of colour but their header was monochrome. I thought that this was prevalent to our website as we decided on a black, grey and purple colour scheme and should incorporate grey into the menu bar.

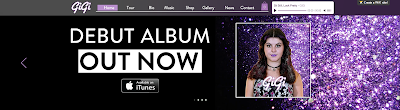
We used Carly Rae Jepsen and Selena Gomez's scrolling slideshow as inspiration for our own website. It allows artists to promote new singles, merchandise or news stories that they want the target audience to click on and explore. I created a few images on Photoshop for the slideshow and I added an invisible button to all of the slides, linking to the relevant web pages.

Our header and slideshow
alongside reference points

Footer and instituions

We produced our footer using various websites for inspiration. Footer conventions include:
  • social media links
  • institution information about the record label
  • occasionally, some "powered by (wonderful union)" crediting the web page designer
  • occasionally, some had a repeat of the artist's name
  • terms and conditions, privacy policy
Our footer, with institutions and social media links
alongside reference points

The links to different social media platforms makes the website an example of cross media convergence because the website is the hub that brings it all together in one place. The different social media pages means that the artist can reach a wider audience. Overall, I think that our footer is conventional and we have all the necessary institutions that most websites have.


First draft and first set of 
target audience feedback

This is the shop page from my group's first draft. I was apprehensive about the website because I felt that, as a consumer, the website did not appeal to me or inspire me to explore it more. However, this could have just been my opinion, so I set out to do target audience feedback and got the following responses:

Target audience feedback (please click to enlarge)


Most people said that they liked the individual items for sale and that the product descriptions and return policy made it seem real and authentic (see image on the right for reference). Although they liked the content on the website, they were not keen on the aesthetics and a key issue that they brought up was the purple colour scheme which they thought should be toned down.

I think that it is important to take the target audience's opinions into account so that we can successfully appeal to them.


Progress updates

This was the original contact page that we set up. The text font and the sign up gadget were still in the original formats and we didn't make much changes to it except for fill in the details for Glass Ceiling records.

Original contact page
We implemented changes to the page in the early stages of production. We added a block of colour to the background so that the text was easily readable. We also added features such as the Glass Ceiling Record logo and the Google Maps widget to show its location, adding to the authenticity of the institution. We also put in a brief description of the record label to give the audience an idea of what the company was about.

In the process of developing the contact page

After our first set of audience feedback, we started to change the colour scheme to black, purple and grey. We put the black and purple gradient on institutional pages: Terms and Conditions, Privacy Policy and the Contact page. As a result of the colour change, the page looks a lot more professional than our previous contact pages. The new colour scheme can be seen in the image below.

Our final contact page

Target audience feedback

Georgina got feedback from her friend, Biri. Biri falls into our primary target audience and her response allows us to gage the reaction of our target audience. Here is what she had to say about the website:


We fixed this issue by adding buttons allowing you to go back to the News and Gallery pages.

Our secondary target audience gave us their opinions, which were very useful to us so that we could tailor the website to younger audiences.


It was important for us to get tertiary audience feedback from older women because we wanted our website to be easy to use for people from their generation so that our website could reach and appeal to a wider audience:


Problems that I faced

There were very few problems that I faced when editing our website. The problems that I encountered were minor and easily fixable.

Some of our Paypal links did not work. When I went to purchase a concert ticket, it failed to take me to Paypal's website. This was simply because the button that we had copied onto every page did not copy the hyperlink. In order to solve this issue, we just added hyperlinks to every button on all 10 tour pages.

Wix has a page limit of 980 pixels. Anything outside of this area is not guaranteed to show up on all devices. Because we were working on large dual screen monitors, we used up all of the space thinking that it would be like that on all devices. However, the page limit meant that some images that we had placed on the sides did not show up on regular sized monitors. We changed the format for most of our website and moved the widgets to the centre of the page where we knew that it would definitely show up.

Although it did not cause us any issues, having to edit one at a time was very bothersome. I would have preferred it if we were able to edit at the same time because that would have been a better use of our time. When all three of us were together in a group, we had to alternate


This is the website that we have created.

Click on the image to enter the website

Overview of our website


Overall, I am pleased with the website that we have produced. I found the software very straight-forward and simple to use. Even though it wasn't particularly challenging in terms of technicalities, formatting the web design such as text font and colour, background images and hyperlinks was very time consuming. I liked that we were able to constantly edit and improve the website. I also liked that we could preview it before publishing as it allowed us to test some of the new gadgets that we put in.


Construction Post 5: Digipak post-production

The production of the digipak was the most changeable element of post production. This was because it was the most susceptible to criticism from the target audience who all had different ideas and contributions, making it harder to perfect and therefore making it more time consuming than we had expected.

I had completed a lot of research into album covers and came up with a lot of creative concepts during our production meetings and so I was able to play a decisive role to the production of our digipak. Because of this, the group put me forward to take the lead in constructing the panels for the album cover.

Below are the flat plans that I created for our digipak panels. Although we made a few changes during the construction process, most of the fundamental ideas were maintained.

Digipak - outside panels flat plan

Digipak - inside panels flat plan

Software

We used Photoshop CS 5.15 to edit our digipak panels. I have used Photoshop before but I did not feel confident in my abilities going into this project. Taking the lead in producing the digipak was unnerving because it was an overwhelming task to complete and I constantly had to change the concepts in response to target audience feedback.

By the end of the the project, I feel that my Photoshop aptitude has improved a lot. By teaching Georgina, who had never used Photoshop before, I was able to reinforce my own knowledge of the basic tools as well as the more intricate tools such as magnetic lasso. I feel like being out of my comfort zone allowed me to experiment more with the activity and I received a lot of response from the target audience, allowing me to improve the product.

Editing the digipak inside panels

Process

We produced our digipak panels using the digipak template on Photoshop.
  • The green space was for the photo itself
  • The blue space was for only text to spill over into
  • The red space was the 'bleed' line where anything in it would get cut off when printing so should only have background over spill - not anything of importance in it
Our digipak template

Below is a Prezi, outlining the Photoshop tools that I used to produce our digipak:


Progress updates

Rough edit
I started the construction of the digipak by producing a rough edit of the outside panels. From this, the group were able to weigh in their opinions and we talked about how we would make the image look visually pleasing. I continued to make changes to this after the target audience had mostly positive things to say about the glitter and the direct address.


The following image is after I added cooling filters to Georgina because the image was too warm. I also added the record label logo and a QR code to adhere to conventions of album covers. I also got inspiration from the text font of Little Mix Get Weird tracklist and made the track names different colours.
Little Mix
Get Weird

Work in process

Changes made
My teacher, Mrs Dymioti, raised concerns about the multi coloured text saying that it didn't tie in with any of the other platforms. This reminded us that our marketing campaign had to be synergistic and have the same colour scheme throughout. Similarly, members of our target audience identified the bright colours as out of place. As a result, we changed the website colour scheme to match with the album's black and purple gradient. I changed the colours to being more purple
based in order to comply with the feedback.

Teacher feedback

I received feedback from my teacher, Mrs Blackborow, who gave me a lot of useful advice on how the front and inside panels must come together to promote the artist.


Grading

I have used various grading adjustments such as levels, cooling filter, curves, colour balance and brighten and contrast. The tools that I used can be seen on the right.

I used:

  • Cooling filters to counteract the saturation
  • Levels to make certain colours more vibrant
  • Exposure to tone down the immense brightness
  • Curves, when I wanted to darken some areas of the photo but keep other areas the same
Before grading
After grading


Before grading
After grading


Target audience feedback

In order to see what our target audience thought of our digipak, we conducted target audience feedback sessions.


Georgina got feedback from Birannavi, a 17 year old fan of the pop genre. These were her thoughts on the digipak:


The secondary target audience liked the album cover. This is their response:


Tertiary audience feedback:


These are our final digipaks


In conclusion to this task, I am pleased with our final digipak. We have incorporated a lot of theory into the production of the album cover and have gotten a lot of audience feedback to improve our product. I think that the outside and inside panels work well together with the glitter theme running across but it also sands on its own and offer different gratifications to the audience's need.

Construction Post 4: Music Video post-production

Editing the music video was very enjoyable for me because I was able to see how all of our ideas in pre production came together to form a realistic music video. I personally felt very confident in editing and was able to contribute a lot to this component of post-production. We had a lot of good quality rushes from our main shoot and were able to work with this to produce an outstanding music video.


Hardware

We used PC edit suites. The dual monitor was particularly useful to us when we worked in groups to edit the music video and when we got target audience feedback because it displayed our editing progress and the video itself on two separate screens.

Our edit suite

Software

We used Adobe Premiere Pro CS 5.5 for editing our sequence. As I have been editing on Adobe Premiere Pro for 3 years now, I was able to cut down, edit and grade shots with ease. 

Our timeline on Premiere Pro

Music video theories

When editing our sequence, we made sure to focus on using music video theories such as Carol Vernallis' theory mentioned in The Kindest Cut and Andrew Goodwin's from Dancing in the Distraction Factory (1992, Routledge).

Due to the music videos different editing style from the classical Hollywood narrative, I learnt and used new techniques that I had learnt from Carol Vernallis such as cutting to the beat, jump cuts, discontinuous flow and breaking the 30 degree rule. This led me to using new tools that I would not have had to use when editing a narrative sequence.

I made sure to apply features that Andrew Goodwin had identified in music videos. I used close ups of Georgina's face as often as possible because record labels demand beauty/money shots, making them conventions in music videos.

Techniques

I have listed the various techniques that I have implemented when editing our music video in a Prezi which can be viewed below:


Personal contribution

I personally contributed a lot to editing the music video and spearheaded the project by organising our Premiere Pro timeline and researching new tools that we could use to improve the music video aesthetic.

Since production weeks 2 and 3, we have continued to develop our music video by adding more shots, match up the lipsync to the lyrics and include fast paced montage editing styles during the middle eight. After making all of the relevant changes, we moved on to grading. I played a significant role in the grading of our music video as I have a very good eye for detail and spent the majority of my time painstakingly adding visual effects to each shot.

Split screen allowed me to see the original image
(right side) and my grading (left side)


An obstacle that I faced when grading was the lighting of the Snow White setups which made Georgina look extremely red. Even after experimenting with Three-Way Colour Corrector and Procamp, the footage was still very red. In order to solve this issue, I looked up ways to reduce the redness of footage on Premiere Pro and came across a video which explained how to use the RGB curves to change the colour of shots.


After I learnt this technique, I tested it out on our Snow White shots, and it worked perfectly. I promptly showed my group members and taught them how to use this tool. As a result of this, I have vastly improved my own understanding of grading and also reinforced our communication as a team.

Editing our music video


In order to gain an understanding of how our target audience would respond to our music video, I conducted target audience feedback sessions as well as got advice from my teachers so that I could make changes to the music video.

In response to the feedback that we got from our media technician, Emma, and our teacher, Mrs Dymioti, I made the following changes:
Teacher feedback
(please click to
enlarge)
  • put different shots on for the ending
  • introduced the female doll earlier on
  • added performance shots throughout the other setups
  • intercut between the different setups
  • found more match on action shots
  • included the shot of Georgina taking off the string in puppet setup

Teacher feedback
(please click to enlarge)
Later on in the week, I got feedback from our teacher, Mrs Blackborow, and noted down her comments which can be seen on the left:

I tightened up the framing by using the motion visual effect. By doing this, I was able to reduce the headroom at the top of the frame and I was able to place Georgina in the centre of the shots. I also took this time to put rotation on a few of the doll house shots so that it looked more even and levelled.


In accordance with this, I also got members of our core target audience to tell us what they liked about our video as well as any improvements that could be made.

Nazifa is 18 years old. She likes to listen to electro pop. She says that, although she enjoyed the music video, it seemed like something that her younger cousins would like more.


Hisham is 17 years old. She prefers R&B to pop music but she strongly identifies as a feminist which is why I wanted her opinion. 


This feedback coincides with the advice that we were given from teachers. We changed the music video by intercutting more to make it more interesting. We also improved the end sequence to a fast paced montage between the different setups. We made the entrance into the doll's house more obvious and we included more shots of the male doll being mean towards the female doll


Similarly, Georgina got target audience feedback from our primary and secondary audiences so that we could see how the music video appealed to members of the wider audience as well as our core audience and how we could tailor the music video to both of their tastes.

Biri is 17 years old. Her favourite music genre is pop. Below is her feedback to our music video:


Sofia is 12 and likes pop music. She likes to listen to music that is on the charts. Her response to our  music video can be seen below:


We dealt with the issues identified by our target audience. I think that the target audience feedback that we gained was very insightful into consumer preferences and we were able to tailor our music video to both our primary and secondary target audiences.

After uploading our finished music video to Youtube, we discovered that some of the shots were out of sync and made the lipsync look out of time. I worked with Gabriel to correct these issues by moving a couple of shots one or two frames earlier so that the visual matches the audio. Although there may still be some small issues with lipsyncing, I believe that we completed snagging to the best of our abilities.

Below is the final music video that we uploaded:


Overall, I am extremely happy with the work that I have done on the music video. My group have been very supportive throughout the process and we have worked together very well. I feel that my personal contribution to the music video post-production has greatly benefitted our project and that I have been able to utilise a lot of skills during this period of time.

The target audience feedback has been very useful to us when we needed to make changes to the video. I was able to make a lot of changes that I probably would not have made if not for our target audience. The vast majority of the responses have been positive, making all of the hard work worthwhile in the end.


Construction Post 3: Week 3 production

For the third week of production, my group will continue to make progress on the music video, the website and the promo shots. Below, I have detailed all of the work that my group has made to the project and how I have contributed to each task.

This week's production schedule

Music video editing

After getting a head start on editing the music video last week, our group are in a good position to continue placing shots onto the timeline. I think that the process has been made much easier due to the way that I have labeled and organised our shots in the folders.

I am glad to say that we have received a lot of positive feedback on our current video. Our target audience really like the cross dissolves between the pans, so I am very glad that I came up with the impromptu idea during our main shoot and that my group thought that it would be feasible to reshoot some of our shots to incorporate it into the other setups.

The cross dissolves into pans have had
a lot of positive responses

Our goals for this week:
  • Place more shots onto the timeline
  • Make sure that the lipsync matched the lyrics
  • Start getting target audience feedback
  • Get feedback from our teachers and our media technician
  • Make changes according to the response
Staying late after school to edit
In order to ensure that the lipsynch was on time, I would match the audio wavelengths and then listen to the sound to make sure that the visual and audio were precisely at the same time. This was largely made easier by expanding the audio bar so that I could actually see the wavelengths.
Using wavelengths to get a good lipsync

By the end of week 3 of production, the music video has begun to take shape. This is how our timeline looks:

Week 3 editing progress

By staying after school to comb through all of our footage, I believe that I have been able to put a good selection of shots onto our timeline. Nevertheless, there is always room for improvement and I am sure that we can improve the music video by substituting the footage for even better shots. Now that we have a full timeline, I want to get feedback from people outside of our group because they may pick up on things that I hadn't noticed.

I got feedback from my teacher and the media technician so that I could receive constructive criticism.

Constructive criticism

Our teachers told us that the narrative should start earlier on in the music video and that we should intercut the doll's house more with the performance shots. This is a convention seen in intertextual & postmodernist music videos such as our own which heavily relies on the narrative.

Our music video demonstrates a hyper conscience perspective because the singer plays multiple extreme characters as well as herself. We also rely on a lot of intertextuality to comply with Goodwin's theory. As a result, our music video becomes predictable because of the overuse of the different setups and intertextual references. Hence why we need to make it more interesting by intercutting more often.

The dolls are introduced early on at 0:22
The introduction of the dolls

I think that the response that we got from our teachers was very useful to us. We made a few changes and I learnt about postmodernist music videos in the process. I will continue to edit and make some changes next week based on the advice that we were given. Next week, I plan to gather more target audience feedback.

Promo shots for the digipak

For this week, we have to retake the promo shots with the revised version of the glitter in Georgina's hair. Because this shot is going to be the image for the front panel of our digipak, it is vital that we get it right. In order to compensate for last week's photos, we took a multitude of shots which can be seen below.

Photos of Georgina from our photoshoot

A tremendous improvement from last week's promo shoot

After we got the shots that we needed, the three of us sat down and looked through every photo, narrowing it down to the ones that we liked the most. We made a note of which shots we would use for our digipak and looked at the flat plan that I made for reference. We also found B-cuts that we would use on our website. These shots were more fun and interactive, which I have found to be conventions of promo shots on websites.

I started editing the photos that we took last week because I want to create a rough edit of our digipak. So far I have used the magnetic lasso, quick selection tool and refine edge to select only Georgina and have placed her onto the digipak template.

Refine edge

A rough edit

Although I have made some progress on the digipak, it has taken me a long time to choose the focal image and I experienced problems with the magnetic lasso. It is surprising that it has taken me this long to produce a rough edit. The time delay was largely due to waiting to reshoot the promo shoots.

Promo shots for the website

Daya's promo shots


Taking photos of Georgina
After seeing Daya's promo shots on her website, I decided that we would get promo shots for the website. We set off to take photos of Georgina in settings similar to Daya. We wanted to get her in front of an industrial looking wall and sitting on an old staircase.


The promo shots that we took
The concept behind this decision was so that we could show an alternative the official promo shoots that we took. I think that we could use these in either the gallery or the bio page as it shows her in a different element, giving her a more human aspect.

Website

We made a lot of progress on the website this week and started adding more to the pages.
Our goals for this week are to:
  • create and add links to social media sites
  • add photos and videos to the gallery page
  • set up purchasing and interactive opportunities - create products and add to shop, write descriptions and return policies

Social media:

We created facebook, twitter, instagram and youtube pages and linked them to the icons in the footer.

Setting social links

Gabriel designed the social media pages, keeping it synergistic across the different media platforms with the same profile picture, channel art and the GiGi logo.

Synergistic social media platforms


Gallery page:

We changed the gallery from the 3D carousel to a polaroid theme. Even though the 3D carousel was fun and interactive, the audience want to view the whole gallery at once and not one at a time. We split the photos into different sections, similar to how Beyonce separates her editorial from her life and performance photos.


(left) a carousel themed gallery        (right) a polaroid themed gallery

Shop:

We have photoshopped more GiGi merchandise for the store to make it seem like a legitimate website. Most artists have dozens of merchandise available for purchase and in order to emulate a real artist's website, we need to customise more products to fill the shop page.

 The addition of new items on the shop page


We have continued to make progress over the course of this week. I am happy with what my group members are achieving in their own sections of production. I personally have gotten a lot done on the music video and the digipak is underway.